Installing Shower In Basement On Concrete Youtube Video
Installing a shower in a basement on concrete can be a challenging but rewarding project. By following these steps and watching the accompanying YouTube video, you can successfully install a shower in your basement.
Step 1: Prepare the concrete floor
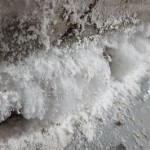
The first step is to prepare the concrete floor for the shower. This involves leveling the floor and creating a slope towards the drain. To level the floor, you can use a self-leveling compound. To create a slope, you can use a mortar bed or a pre-sloped shower pan liner.
Step 2: Install the shower pan liner
The next step is to install the shower pan liner. A shower pan liner is a waterproof membrane that helps to keep water from seeping through the floor. To install the shower pan liner, you will need to first cut it to size. Then, you will need to apply a layer of thinset mortar to the floor and press the shower pan liner into place. Be sure to seal all of the seams and penetrations in the shower pan liner.
Step 3: Install the shower drain
The next step is to install the shower drain. The shower drain is responsible for draining water away from the shower. To install the shower drain, you will need to first cut a hole in the concrete floor. Then, you will need to insert the shower drain into the hole and secure it in place. Be sure to seal the drain flange with a waterproof sealant.
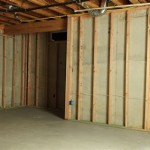
Step 4: Install the shower walls
The next step is to install the shower walls. The shower walls can be made from a variety of materials, including tile, acrylic, or fiberglass. To install the shower walls, you will need to first apply a layer of thinset mortar to the studs. Then, you will need to press the shower walls into place. Be sure to seal all of the seams and penetrations in the shower walls.
Step 5: Install the shower fixtures
The next step is to install the shower fixtures. The shower fixtures include the shower head, the shower handle, and the soap dish. To install the shower fixtures, you will need to first drill holes in the shower walls. Then, you will need to insert the shower fixtures into the holes and secure them in place. Be sure to seal all of the penetrations around the shower fixtures.
Step 6: Grout the shower
The next step is to grout the shower. Grout is a type of mortar that is used to fill in the joints between the tiles. To grout the shower, you will need to first mix the grout according to the manufacturer's instructions. Then, you will need to apply the grout to the joints between the tiles. Be sure to press the grout into the joints and clean off any excess grout.
Step 7: Seal the shower
The final step is to seal the shower. Sealing the shower helps to keep water from seeping through the grout and damaging the shower. To seal the shower, you will need to apply a layer of waterproof sealant to all of the seams and penetrations in the shower. Be sure to follow the manufacturer's instructions for applying the sealant.

How To Install A Basement Bathroom Awesome Quick Tips By Home Repair Tutor

Curbless Shower Build Over Concrete Youtube

Concrete Floor For Curbless Shower Basement Bath

Diy Basement Bathroom Part 1 Shower Stall Frame Drain

Installing A Curbless Shower On Concrete Slab

How To Install A Basement Bathroom Ask This Old House

How To Install Oatey Shower Drain On A Concrete Slab For Pan Liner

Easily Install Curbless Shower In Existing Concrete Slab

How To Install Bathroom Bar Plumbing In A Basement

How To Install A Bathtub In Basement Bathrooms By Home Repair Tutor Youtube
Related Posts