How To Sheetrock Basement Walls
Sheetrock, also known as drywall, is a common material used to finish basement walls. It is a relatively easy and inexpensive way to create a smooth, finished surface. However, there are a few things to keep in mind when sheetrocking basement walls. The moisture level in basements can be high, so it is important to use mold-resistant drywall. You will also need to take steps to prevent the drywall from becoming damaged by moisture.
Here are the steps on how to sheetrock basement walls:
- Prepare the walls. The first step is to prepare the walls for sheetrock. This involves removing any existing drywall or paneling, as well as any nails or screws. You will also need to repair any holes or cracks in the walls.
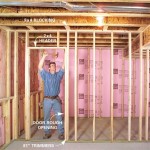
- Install furring strips. Furring strips are thin strips of wood that are attached to the walls. They provide a nailing surface for the drywall. Furring strips should be installed horizontally, spaced 16 inches apart. Use a level to make sure that the furring strips are level.
- Install the drywall. The next step is to install the drywall. Starting in a corner, lift a sheet of drywall and place it against the furring strips. Use a drywall screw gun to attach the drywall to the furring strips. Drive the screws in at a slight angle, and countersink them slightly below the surface of the drywall.
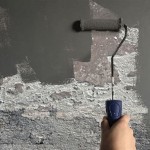
- Tape and mud the seams. Once the drywall is installed, you will need to tape and mud the seams. This will create a smooth, finished surface. Use a joint compound and a drywall knife to apply the tape and mud. Allow the mud to dry, then sand it smooth.
- Prime and paint the walls. The final step is to prime and paint the walls. This will protect the drywall from moisture and give it a finished look. Use a latex primer and paint specifically designed for drywall.
Here are some additional tips for sheetrocking basement walls:
- Use mold-resistant drywall.
- Install a vapor barrier behind the drywall.
- Caulk the seams between the drywall and the floor and ceiling.
- Ventilate the basement to prevent moisture buildup.
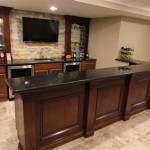
By following these steps, you can successfully sheetrock basement walls and create a smooth, finished surface.

Don T Test Your Luck With Drywall Why Our Waterproofed Basement Walls Are The Way To Go News And Events For Total Finishing

Beginners Guide To Installing Basement Drywall Semigloss Design

Can You Put Drywall Over Brick Wall Quora

How To Put Drywall Over Garage Uneven Concrete Wall Home Improvement Stack Exchange

What Type Of Drywall To Use In A Basement Wallboard Trim Tool

Basement Drywall Restoration Total Finishing

How To Finish A Basement Wall Diy Family Handyman

Basement Beautification A Complete Guide To Perfecting Drywall Installation

Healthy Safe Moisture Mold Free Basement Living Space This Is Drywall

Finishing Our Basement 25 Diy Hanging Taping Drywall
Related Posts