How to Put Up a Wall in a Finished Basement
Adding a wall to a finished basement can provide valuable space for a variety of purposes, from creating a home office to separating a play area for children. While seemingly daunting, constructing a basement wall is a manageable DIY project with proper planning and execution. This article outlines the essential steps involved in building a wall in your finished basement effectively and safely.
1. Planning and Preparation
Before embarking on construction, careful planning and preparation are crucial. This phase sets the foundation for a successful project:
a. Design and Measurement: Determine the wall's location, size, and purpose. Measure the space accurately, accounting for existing features and potential obstacles like plumbing or electrical lines. Consider whether you need a load-bearing wall, which will require specific structural support.
b. Check for Permits: Verify local building codes and regulations, as certain projects may require permits. Consult with your city or county building department for specific requirements.
c. Gather Materials: Based on the wall's dimensions and load-bearing needs, acquire the necessary materials. This may include:
- Stud framing lumber (2x4s or 2x6s)
- Wall sheathing (plywood, OSB, or drywall)
- Drywall screws and nails
- Drywall tape and joint compound
- Insulation (if desired)
- Baseboard and door trim
- Caulk and paint
- Safety gear (gloves, eye protection, hearing protection)
d. Clear the Area: Remove furniture, belongings, and any obstructions from the construction zone. Ensure the area is clean and free from clutter.
e. Electrical and Plumbing:
Locate and mark any electrical or plumbing lines that will be affected by the new wall. If necessary, consult a professional electrician or plumber to relocate or disconnect these services before construction begins.2. Framing the Wall
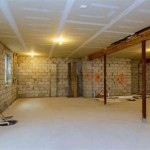
Framing the wall is the structural foundation. This process involves building a skeleton of studs that will support the sheathing and finish materials:
a. Establishing a Foundation: Create a sturdy foundation for the wall. If the existing floor is concrete, consider installing a ledger board secured to the concrete using concrete anchors. Other options include building a sill plate on top of the existing flooring or using pressure-treated lumber for added moisture resistance.
b. Erecting Studs: Cut the stud lumber to the desired height and space them 16 inches on center. Install the studs on the ledger board, ensuring they are plumb and level. If the wall is load-bearing, use thicker studs and consider adding blocking for additional support.
c. Top Plate Installation: Secure a top plate at the top of the wall, connecting the studs. If needed, use shims to ensure the top plate is level and plumb.
d. Door and Window Openings: If the wall includes a door or window opening, create the framing for these openings using jack studs and header boards.
3. Sheathing and Insulation
Sheathing provides structural rigidity and acts as a base for finishing materials. Insulation improves energy efficiency:
a. Sheathing Installation: Attach sheets of plywood, OSB, or drywall to the stud framing, ensuring they are securely fastened. Stagger the joints for added strength and stability.
b. Insulation: If desired, install insulation between the studs. This can be fiberglass batts, blown-in cellulose, or rigid foam. For optimal energy efficiency, consider using a vapor barrier to prevent moisture buildup.
4. Finishing the Wall
The final stage involves completing the wall's surface and making it aesthetically pleasing:
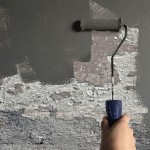
a. Drywall Installation: Install sheets of drywall over the sheathing. Use drywall screws for secure attachment.
b. Joint Tape and Mudding: Cover the seams between drywall panels with joint tape and apply joint compound over the tape and screw heads. Apply multiple coats of joint compound, sanding each layer smooth before adding the next.
c. Priming and Painting: After sanding the finished joint compound, prime the drywall with a quality primer. Once the primer dries, paint the wall with the desired color.
d. Trim and Baseboard: Install baseboard along the wall's bottom edge and any necessary trim around windows or doors. These elements create a finished look and cover the raw edges of the drywall.
5. Safety Considerations
Working with power tools and heavy materials requires safety precautions:
a. Use Proper Safety Gear: Always wear eye protection, gloves, and hearing protection when using power tools or handling materials.
b. Secure Tools and Materials: Store tools and materials safely to prevent accidents and ensure they are not a tripping hazard.
c. Be Aware of Electrical and Plumbing Lines: Double-check the location of electrical and plumbing lines to avoid damage.
d. Follow Manufacturer Instructions: Always follow the instructions provided by the manufacturer for power tools, materials, and safety equipment.

Can I Leave Existing Drywall Alone When Adding Two Small Walls To A Finished Basement Home Improvement Stack Exchange

Build A Wall In Finished Basement Diy Nandemoguy Project

How To Finish A Basement Diy

How To Finish A Basement Diy

Build A Wall In Finished Basement Diy Nandemoguy Project Youtube

How To Finish A Basement Wall My Foundation Repairs
:strip_icc()/100411894-b6c1f41941194958b4b347ad47b1998e.jpg?strip=all "18 Ways To Make Your Basement Walls Beautiful")
18 Ways To Make Your Basement Walls Beautiful

How To Finish Basement Walls Diy Finishing

6 Finishing Basement Drywall Installation

Don T Test Your Luck With Drywall Why Our Waterproofed Basement Walls Are The Way To Go News And Events For Total Finishing
Related Posts