How To Install a Sump Pit in Your Basement
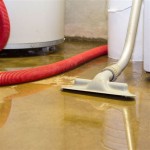
Basement water intrusion is a common problem for homeowners, potentially leading to structural damage, mold growth, and significant property devaluation. Installing a sump pit, coupled with a sump pump, is a proactive measure to manage groundwater and prevent water accumulation within the basement. The following provides a comprehensive guide on how to properly install a sump pit in a basement.
Assessing the Need and Planning the Installation
Before commencing the installation process, a thorough assessment of the basement's susceptibility to water intrusion is crucial. This assessment should involve observing the basement during and after periods of heavy rainfall. Signs of water seepage, dampness, or standing water indicate a definite need for a sump pit system. The assessment should also consider the soil type surrounding the foundation. Clay-rich soils tend to retain more water, increasing the likelihood of water accumulation around the foundation.
Planning is equally important. Determining the optimal location for the sump pit involves considering several factors. The location should be in the lowest area of the basement, where water naturally tends to accumulate. It should also be accessible for maintenance and away from frequently used areas. Furthermore, proximity to an electrical outlet and a discharge point for the sump pump is essential.
Obtaining the necessary permits from the local municipality is a critical step. Building codes often regulate sump pit installations, particularly concerning drainage and electrical work. Contacting the local building department to inquire about permit requirements and regulations is highly recommended. Failure to obtain the required permits can result in fines and potential rework.
Gathering the necessary tools and materials is essential for a smooth installation process. This includes a jackhammer or sledgehammer and cold chisel for breaking concrete, a shovel for excavation, a sump pit basin (usually plastic or concrete), a level, a measuring tape, safety glasses, gloves, a dust mask, gravel, concrete mix (if required), and a sump pump. Ensuring all tools are in good working order and materials are readily available will minimize delays during the installation.
Excavating and Preparing the Sump Pit
The first step involves marking the area where the sump pit will be located. The diameter of the sump pit basin should be used as a guide for marking the area on the concrete floor. It is recommended to add an extra few inches to the diameter to allow for easier installation and gravel placement around the basin.
Breaking through the concrete floor requires caution and the proper tools. If the concrete is relatively thin, a sledgehammer and cold chisel may suffice. For thicker concrete, a jackhammer is recommended. Start by scoring the concrete along the marked line to create a clean break. Gradually chip away the concrete, working inwards towards the center of the marked area. Safety glasses and a dust mask are imperative to protect against flying debris and concrete dust.
Excavating the hole is the next step. The depth of the hole should be sufficient to accommodate the sump pit basin, ensuring that the top of the basin is flush with the surrounding concrete floor. This requires careful measurement and frequent checks with a level. Use a shovel to remove the excavated soil and debris. Dispose of the debris responsibly, following local regulations.
Preparing the base of the hole is crucial for proper drainage. A layer of gravel, typically 4-6 inches thick, should be placed at the bottom of the hole. This gravel layer provides a permeable base that allows water to easily flow into the sump pit. Level the gravel layer and compact it slightly to create a stable foundation for the sump pit basin.
Installing the Sump Pit Basin and Sump Pump
Carefully position the sump pit basin into the excavated hole. Ensure that the top of the basin is flush with the surrounding concrete floor. Use a level to verify that the basin is perfectly level in all directions. Adjust the gravel layer beneath the basin as needed to achieve a level installation.
Backfilling around the sump pit basin with gravel is important to facilitate drainage. Fill the space between the basin and the surrounding soil with gravel, ensuring that the gravel is evenly distributed around the basin. The gravel allows water to easily flow from the surrounding soil into the sump pit. Compact the gravel slightly to prevent settling.
If necessary, concrete can be used to secure the sump pit basin and create a smooth transition between the basin and the existing concrete floor. Mix the concrete according to the manufacturer's instructions. Apply the concrete around the edge of the basin, filling any gaps between the basin and the existing concrete floor. Smooth the surface of the concrete to create a seamless transition. Allow the concrete to cure completely before proceeding.
Installing the sump pump involves carefully lowering the pump into the sump pit basin. Most sump pumps come with a float switch that automatically activates the pump when the water level reaches a certain point. Ensure that the float switch can move freely without obstruction. Follow the manufacturer's instructions for connecting the sump pump to the discharge pipe.
Connecting the discharge pipe is a critical step. The discharge pipe carries the water pumped out of the sump pit away from the foundation. The discharge pipe should be made of rigid PVC pipe and sloped away from the house to prevent water from flowing back towards the foundation. The discharge point should be located at least 10 feet away from the foundation and preferably in an area where the water can drain away easily, such as a ditch or a storm drain. Check local codes for regulations regarding discharge locations.
Testing and Final Adjustments
Testing the sump pump is essential to ensure that it is functioning correctly. Fill the sump pit with water using a garden hose. Observe the sump pump as the water level rises. The pump should automatically activate when the water level reaches the activation point of the float switch. Verify that the pump is effectively removing water from the sump pit and that the water is being discharged away from the foundation.
Adjusting the float switch may be necessary to optimize the pump's performance. Some float switches are adjustable, allowing the user to control the water level at which the pump activates. Adjust the float switch according to the manufacturer's instructions to achieve the desired activation point. Monitor the pump's performance after making adjustments to ensure that it is functioning optimally.
Securing the discharge pipe is crucial to prevent leaks and ensure proper drainage. Use pipe clamps to secure the discharge pipe to the sump pump and at various points along its length. Inspect all connections for leaks and tighten the clamps as needed. A properly secured discharge pipe will prevent water from leaking back into the basement and ensure that the water is effectively discharged away from the foundation.
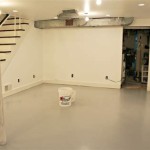
Final cleanup involves removing any debris and tools from the work area. Sweep or vacuum the basement floor to remove any concrete dust or dirt. Dispose of any remaining materials responsibly. A clean and organized work area will help to prevent accidents and ensure that the sump pit installation is aesthetically pleasing.
Regular inspection and maintenance of the sump pit and sump pump are essential to ensure their continued performance. Check the sump pit regularly for debris, such as leaves or dirt, that may clog the pump. Clean the sump pit and pump as needed. Test the pump periodically to ensure that it is functioning correctly. Replace the sump pump every 5-7 years, or as needed, to prevent failure.
Addressing Potential Challenges
Encountering bedrock during excavation can present a significant challenge. Bedrock is extremely hard and difficult to break through. If bedrock is encountered, it may be necessary to relocate the sump pit to a different location. Alternatively, specialized drilling equipment may be required to penetrate the bedrock. Consulting with a professional contractor is recommended in such cases.
High water table conditions can also pose challenges during sump pit installation. A high water table can cause the excavated hole to fill with water, making it difficult to work. Pumping the water out of the hole may be necessary to allow for excavation and installation. Alternatively, a well point system can be used to lower the water table around the excavation site.
Dealing with existing utilities requires caution. Before commencing excavation, it is essential to locate any underground utilities in the area. Contact the local utility companies to mark the location of any buried pipes or cables. Dig carefully around utilities to avoid damaging them. If a utility is encountered, stop excavation and contact the utility company for assistance.

Basement Sump Pump Sedona Waterproofing Solutions

Diy Sump Pump Install Your Own Smd Fluid Controls

Sump Pump Installation In Minneapolis Paul Bunyan

Sump Pump Installation How To Install A Homeserve Usa

Diy Sump Pump Install Your Own Smd Fluid Controls

Sump Pits Introductory Guide Water Commander

How To Install A Sump Pump

Permanent Fixes For Damp Basements Diy

Sump Pump Installation In Montana Installing A System Billings Livingston Miles City Mt

How To Install A Sump Pump Installation Hamilton
Related Posts