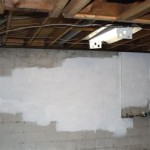
How To Paint a Concrete Basement Floor: A Comprehensive Guide
Painting a concrete basement floor is a cost-effective way to revitalize the space, protect it from moisture damage, and improve its overall appearance. A freshly painted floor can transform a drab, utilitarian basement into a more inviting and functional area. This article provides a detailed, step-by-step guide on how to properly prepare and paint a concrete basement floor, ensuring a durable and aesthetically pleasing finish.
The process involves careful preparation, selection of appropriate materials, and application techniques. Skipping steps or using inferior products can lead to peeling, cracking, or other issues that will necessitate redoing the project. This guide emphasizes the importance of each stage, offering practical advice and best practices to achieve professional results.
Key Point 1: Preparation is Paramount
The success of any painting project hinges on thorough preparation, and painting a concrete basement floor is no exception. Concrete is a porous material that requires proper cleaning, patching, and priming to ensure the paint adheres correctly and lasts for years to come. Failing to adequately prepare the surface is the most common reason for paint failure.
The first step is to remove everything from the basement floor. This includes furniture, boxes, appliances, and any other items that might obstruct the work area. A completely empty floor allows for unrestricted access and facilitates a more thorough cleaning and preparation process. Ensure adequate ventilation during this phase.
Next, the floor needs to be thoroughly cleaned. Begin by sweeping or vacuuming the entire area to remove loose dirt, dust, and debris. A shop vacuum is particularly useful for this task as it can handle both fine particles and larger debris effectively. Pay special attention to corners and edges where dust tends to accumulate.
Following the initial cleaning, scrub the floor with a concrete cleaner and degreaser. These products are specifically formulated to remove grease, oil, and other contaminants that can interfere with paint adhesion. Follow the manufacturer's instructions regarding dilution ratios and application methods. A stiff-bristled brush or scrubbing machine can be used to agitate the cleaner and loosen stubborn grime. Allow the cleaner to dwell on the surface for the recommended time before rinsing thoroughly with clean water.
After rinsing, inspect the floor for any cracks, holes, or other imperfections. These need to be repaired before painting. Use a concrete patching compound to fill in cracks and holes, following the manufacturer's instructions for application and curing time. For larger cracks, consider using a concrete crack filler that is designed for structural repairs. Allow the patching compound to dry completely before sanding smooth to blend with the surrounding surface. A concrete grinder can be used for larger imperfections to create a level surface.
Once the repairs are completed and the floor is clean and dry, it's crucial to test for moisture. Concrete can absorb moisture from the ground, and excessive moisture can cause paint to peel. Tape a plastic sheet (approximately 1 foot square) to the floor in several different locations using duct tape. Leave the plastic in place for 24-48 hours. If moisture accumulates under the plastic, it indicates a potential moisture problem. Addressing moisture issues before painting is essential. This may involve using a concrete sealer or potentially installing a drainage system or addressing external sources of moisture.
Finally, apply a concrete primer specifically designed for painting concrete floors. The primer helps to seal the surface, improve paint adhesion, and create a uniform base for the paint. Follow the manufacturer's instructions for application, drying time, and coverage. Choose a primer that is compatible with the type of paint you intend to use. Some primers also offer moisture resistance, which can be beneficial for basement floors. Applying a second coat of primer might be needed depending on the porosity of the concrete.
Key Point 2: Selecting the Right Paint and Tools
Choosing the appropriate paint and tools is critical for achieving a durable and professional-looking finish. There are several types of paint available for concrete floors, each with its own advantages and disadvantages. Selecting the right type of paint depends on the specific needs of the space, the level of foot traffic, and the desired aesthetic.
Epoxy paint is a popular choice for basement floors due to its durability, resistance to chemicals and abrasion, and ability to create a hard, glossy finish. Epoxy paints typically come in two parts that need to be mixed together before application. Follow the manufacturer's instructions carefully when mixing the components to ensure proper curing. Epoxy is more resistant than acrylic alternatives.
Acrylic latex paint is another option for concrete floors, although it is generally less durable than epoxy. It is easier to apply and clean up than epoxy, and it is also more breathable, which can be beneficial for floors that are prone to moisture. Choose a paint that is specifically formulated for concrete floors to ensure good adhesion and durability. Look for paints labeled as "porch and floor paint" or "concrete floor paint."
One-part epoxy paints are sometimes marketed. These are typically acrylic latex paints with added epoxy resins. They offer better durability than standard acrylic latex paint, but not as much as a true two-part epoxy. They are simpler to apply than two-part epoxies. Consider the trade-off between ease of application and durability when making your choice.
In addition to the paint, you will need a variety of tools to complete the project. These include paint rollers (a 9-inch roller with a 3/8-inch nap is a good general-purpose choice), paint brushes (for cutting in edges and corners), paint trays, mixing buckets, stir sticks, painter's tape, drop cloths, and a roller extension handle. A concrete grinder may be needed for larger imperfections that are not easily fixed using patching compound. A shop vacuum will facilitate cleaning and dust removal.
When selecting rollers and brushes, choose high-quality options designed for use with the type of paint you are applying. Cheap rollers and brushes can shed bristles and leave streaks, resulting in an uneven finish. A roller extension handle will make it easier to reach all areas of the floor without having to bend over or kneel, which can save time and reduce fatigue.
Painter's tape is essential for creating clean, crisp lines along walls, baseboards, and other areas that you want to protect from paint. Use a high-quality tape that is designed for use on concrete surfaces. Apply the tape carefully, ensuring that it is firmly adhered to the surface. If necessary, use a putty knife or other tool to press the tape down along the edges to create a tight seal.
Safety equipment is also important. Wear gloves and eye protection to protect yourself from paint and cleaning chemicals. A respirator or dust mask is recommended when sanding or working with epoxy paints. Ensure adequate ventilation in the basement during the entire painting process.
Key Point 3: Application Techniques and Best Practices
Proper application techniques are crucial for achieving a smooth, even, and durable paint finish. Applying the paint correctly will ensure that it adheres properly to the surface and provides long-lasting protection. Following best practices during the application process will minimize errors and maximize the chances of success.
Before starting to paint, stir the paint thoroughly to ensure that the pigments are evenly distributed. Use a stir stick to mix the paint from the bottom of the can to the top. Avoid shaking the paint, as this can create air bubbles that can affect the finish.
Begin by "cutting in" the edges and corners of the floor using a paint brush. This involves painting a narrow strip of paint along the perimeter of the room where the floor meets the walls, baseboards, or other surfaces. Cutting in helps to create clean, straight lines and ensures that the paint covers these hard-to-reach areas. Use a steady hand and apply the paint evenly to avoid drips and runs.
After cutting in, use a paint roller to apply the paint to the rest of the floor. Start in one corner of the room and work your way across the floor in a systematic manner. Overlap each roller stroke slightly to ensure that the entire surface is covered evenly. Avoid applying the paint too thickly, as this can lead to runs, drips, and uneven drying. Applying two thin coats is generally better than applying one thick coat.
Maintain a "wet edge" as you paint, meaning that you are always rolling into an area that is still wet. This helps to blend the roller strokes together and create a seamless finish. If the paint starts to dry before you can roll over it, it can create visible lines and marks.
Allow the first coat of paint to dry completely before applying the second coat. Follow the manufacturer's instructions for drying time, which may vary depending on the type of paint and the ambient temperature and humidity. Applying the second coat too soon can cause the first coat to peel or blister.
When applying the second coat, use the same techniques as you used for the first coat. Apply the paint evenly and maintain a wet edge. However, consider rolling in the opposite direction from the first coat. This process helps to ensure that the paint covers the surface completely and creates a uniform finish.
Once the second coat is dry, carefully remove the painter's tape. Pull the tape away from the painted surface at a 45-degree angle to prevent the paint from chipping or peeling. If the paint is still slightly tacky, use a utility knife to score along the edge of the tape before removing it. This will help to create a clean, crisp line.
Allow the painted floor to cure completely before placing furniture or other items on it. Curing time may vary depending on the type of paint, but it is generally recommended to wait at least 24-48 hours before subjecting the floor to heavy traffic or weight. Avoid washing or scrubbing the floor for at least a week after painting to allow the paint to fully harden.
Maintaining a painted concrete floor involves regular cleaning and occasional touch-ups. Sweep or vacuum the floor regularly to remove dirt and debris. Clean spills immediately to prevent staining. Use a mild detergent and water to clean the floor, avoiding harsh chemicals or abrasive cleaners. If necessary, touch up any areas that are chipped or scratched with matching paint.

How I Painted My Concrete Floor Diy Budget Friendly Basement Option

Diy Basement On A Budget Painting Concrete Floor Alyssa Rodriguez

How To Paint A Basement Floor Ace Hardware

How To Paint Concrete Floors Diy Makeover

How To Paint Concrete Floors Homewithstefani

How To Paint Concrete Floor Basement Prepare Youtube

Your Concrete Basement With Leggari Products Simple Diy Project

How To Paint Concrete Basement Floors Yourself Building Bluebird

How To Paint Concrete Basement Floors Yourself Building Bluebird

How To Paint Concrete Basement Floors Yourself Building Bluebird


