How To Lay Carpet On Basement Floor: A Comprehensive Guide
Transforming a basement into a comfortable and usable living space often involves laying carpet. Carpet provides warmth, reduces noise, and adds a touch of comfort to what can otherwise be a cold and uninviting environment. Successfully installing carpet on a basement floor, however, requires careful planning and execution, taking into account the unique challenges presented by below-grade environments. These challenges commonly include moisture and temperature fluctuations that can significantly affect the longevity and performance of your carpet installation.
This article provides a detailed, step-by-step guide on how to lay carpet on a basement floor, ensuring a lasting and aesthetically pleasing result. It covers all crucial aspects from preparation and material selection to the actual installation process, emphasizing the importance of moisture control and proper ventilation. The information presented aims to equip homeowners and DIY enthusiasts with the knowledge necessary to undertake this project with confidence.
Key Point 1: Preparing the Basement Floor for Carpet Installation
Proper preparation of the basement floor is the cornerstone of a successful carpet installation. Failure to adequately prepare the subfloor can lead to a variety of problems, including mold growth, carpet deterioration, and an uneven or unstable surface. The preparation process encompasses several critical steps that must be completed before the carpet itself is unrolled.
Initial Inspection and Cleaning: The first step involves a thorough inspection of the existing basement floor. Look for cracks, holes, or uneven areas. These imperfections must be addressed before proceeding. Remove any existing flooring, debris, dirt, or adhesives. A scraper and a stiff brush can be helpful in removing stubborn residue. After removing all debris, thoroughly clean the floor with a shop vacuum to remove dust and small particles. This step helps create a clean surface for subsequent treatments.
Moisture Testing: Basements are prone to moisture issues, which can be detrimental to carpet and underlayment. Before installing any flooring, it is crucial to test the moisture level of the concrete slab. Several methods can be used, including a calcium chloride test (also known as a moisture vapor emission rate test) or a relative humidity probe test. These tests measure the rate at which moisture is escaping from the concrete. If the moisture level is too high, it must be addressed before installing carpet. Recommended moisture vapor emission rates for carpet installations vary depending on the carpet manufacturer and type, so consult the specifications for your specific carpet. Generally, rates above 3 pounds per 1,000 square feet per 24 hours may necessitate the use of a moisture barrier.
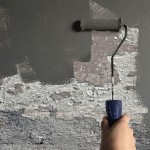
Addressing Moisture Issues: If moisture testing reveals excessive moisture levels, a moisture barrier is essential. This barrier prevents moisture from migrating through the concrete and damaging the carpet and underlayment. Options include liquid-applied epoxy coatings or polyethylene sheeting. Liquid-applied barriers are typically rolled or brushed onto the concrete surface and create a seamless, waterproof membrane. When using polyethylene sheeting, ensure it is securely taped at the seams and edges to prevent moisture from seeping underneath. Consult manufacturer instructions for proper application techniques and recommended film thicknesses.
Repairing Cracks and Uneven Areas: Any cracks or uneven areas in the concrete floor must be repaired. Small cracks can be filled with a concrete crack filler or patching compound. For larger cracks or significant unevenness, a self-leveling concrete compound may be necessary. These compounds are designed to create a smooth, level surface for flooring installation. Follow the manufacturer's instructions carefully when applying self-leveling compounds, ensuring the product is properly mixed and applied to the recommended thickness. Allow sufficient drying time before proceeding with the next step.
Applying Concrete Sealer (Optional): Applying a concrete sealer can further protect the floor from moisture and improve adhesion of subsequent layers. Choose a sealer specifically formulated for concrete floors and follow the manufacturer's instructions for application. Some sealers also offer added protection against radon gas, which can be a concern in some basements.
Key Point 2: Selecting the Right Carpet and Underlayment
Choosing the appropriate carpet and underlayment is paramount for a successful basement carpet installation. Considering moisture resistance, durability, and insulation properties will contribute to the longevity and overall comfort of the carpet. Unlike carpets installed on upper floors, basement carpets are more susceptible to moisture damage and require careful selection.
Carpet Fiber Selection: Synthetic fibers such as nylon, polypropylene (olefin), and polyester are generally preferred for basement installations due to their inherent moisture resistance. Nylon is a durable and resilient option, but it can be more expensive than other synthetic fibers. Polypropylene is highly stain-resistant and water-resistant, making it an excellent choice for basements prone to dampness. Polyester is a budget-friendly option, but it may not be as durable as nylon or polypropylene. Avoid natural fibers like wool, which are highly absorbent and susceptible to mold and mildew growth in damp environments.
Carpet Construction: Consider the carpet’s construction type. Loop pile carpets, such as Berber, are generally more durable and resistant to crushing than cut pile carpets. Loop pile carpets also tend to be more stain-resistant and easier to clean. Cut pile carpets, such as Saxony or Frieze, offer a softer and more luxurious feel, but they may be more prone to showing wear and tear in high-traffic areas. Consider a low-pile carpet to further minimize moisture retention and ease cleaning.
Choosing Underlayment: The underlayment provides cushioning, insulation, and sound absorption. For basement installations, select an underlayment specifically designed for use on concrete floors. Look for underlayments with a built-in moisture barrier to provide an additional layer of protection against moisture. Closed-cell foam underlayments are generally preferred due to their water resistance and durability. Avoid open-cell foam underlayments, which can absorb moisture and promote mold growth. Consider the thickness of the underlayment; a thicker underlayment will provide more cushioning and insulation but may not be suitable for areas with low ceiling heights.
Antimicrobial Properties: Look for carpets and underlayments treated with antimicrobial agents. These agents inhibit the growth of mold, mildew, and bacteria, which can be particularly beneficial in a basement environment. Check product labels for information on antimicrobial treatments and their effectiveness.
Considerations for Allergies: Basements can be breeding grounds for allergens. Choose carpets and underlayments that are hypoallergenic and resistant to dust mites. Low-VOC (volatile organic compound) carpets and adhesives can also help improve indoor air quality and reduce the risk of allergic reactions.
Key Point 3: Carpet Installation Techniques for Basement Floors
The actual carpet installation process involves several steps, including cutting the carpet, securing it to the floor, and finishing the edges. Using the correct tools and techniques will ensure a professional-looking and long-lasting installation.
Gathering Tools and Materials: Before starting, gather all the necessary tools and materials. These include a carpet knife, a knee kicker, a power stretcher, a seam roller, a measuring tape, a chalk line, a vacuum cleaner, carpet adhesive, and tack strips (if using). Ensure the carpet knife has sharp blades to facilitate clean and precise cuts. A knee kicker helps to stretch the carpet and secure it around the perimeter of the room. A power stretcher is essential for larger rooms to ensure the carpet is properly stretched and wrinkle-free. A seam roller is used to flatten and secure carpet seams. Carpet adhesive secures the carpet to the floor, particularly on concrete surfaces.
Installing Tack Strips (Optional): Tack strips are narrow strips of wood with embedded tacks that are installed around the perimeter of the room. The carpet is then stretched over the tack strips and secured to them. Tack strips provide a secure and professional-looking installation, but they are not always necessary, especially when using carpet adhesive. When installing tack strips, ensure they are properly aligned and securely fastened to the concrete floor using concrete nails or adhesive. Leave a small gap between the tack strips and the wall to allow the carpet to be tucked in.
Cutting and Fitting the Carpet: Unroll the carpet in the room and allow it to acclimate to the temperature for at least 24 hours. This helps the carpet relax and reduces the risk of shrinkage after installation. Use a measuring tape and a chalk line to mark the cut lines on the carpet. Cut the carpet slightly larger than the room dimensions to allow for trimming and adjustments. Use a carpet knife to make precise cuts, following the marked lines. When cutting around corners or doorways, carefully measure and cut the carpet to fit snugly. Remember to prioritize safety when using the carpet knife, always cutting away from yourself.
Applying Carpet Adhesive: If using carpet adhesive, apply it evenly to the concrete floor using a trowel. Follow the manufacturer's instructions for the proper application rate and drying time. Work in small sections to prevent the adhesive from drying out before the carpet is installed. Position the carpet carefully onto the adhesive, ensuring it is properly aligned and wrinkle-free. Use a seam roller to press the carpet firmly into the adhesive, working from the center outwards to remove any air pockets.
Stretching and Securing the Carpet: Use a knee kicker and a power stretcher to stretch the carpet and secure it to the tack strips (if used) or the adhesive. Start by stretching the carpet in one direction and then repeat the process in the opposite direction. Ensure the carpet is taut and wrinkle-free. If using tack strips, use a carpet tucking tool to tuck the edges of the carpet into the gap between the tack strips and the wall. Trim any excess carpet along the edges using a carpet knife.
Seaming the Carpet: If the room requires multiple pieces of carpet, create a seamless seam. Align the edges of the carpet pieces carefully, ensuring the pattern matches. Use a seam roller to flatten and secure the seam. Apply seam tape underneath the seam to provide additional strength and prevent unraveling. Heat-activated seam tape offers superior adhesion and durability.
Finishing Touches: After the carpet is installed, thoroughly vacuum the entire area to remove any loose fibers or debris. Install baseboards or molding to cover the edges of the carpet and provide a finished look. Inspect the installation for any imperfections and make any necessary repairs or adjustments. Ensure proper ventilation in the basement to help prevent moisture buildup and prolong the life of the carpet.
By following these detailed instructions, homeowners can successfully install carpet on a basement floor, creating a comfortable and inviting living space while mitigating the risks associated with moisture and humidity. Careful planning, proper preparation, and the selection of appropriate materials are key to achieving a long-lasting and aesthetically pleasing result.

How To Carpet A Basement Floor Diy Family Handyman

How To Install Carpet On Concrete Basement With S

The Best Basement Carpet For Do It Yourself Diy Installations

How To Install Carpet On Concrete

How To Install Carpet On Concrete Basement With S

5 Best Carpeting Ideas For Basements

How To Install Carpet On Concrete

Can You Put Floating Carpet Tiles Over Tile Or Concrete Ideas

Making Our Basement Home Office Cozier With Carpet Tiles Girl Loves Glam

Can You Put Carpet Over Concrete Ready To Diy
Related Posts