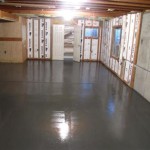
How To Lay Carpet On Basement Cement Floor
Installing carpet on a basement cement floor can transform a cold, utilitarian space into a warmer, more inviting living area. However, due to the inherent characteristics of concrete, such as its porosity and susceptibility to moisture, careful preparation and execution are crucial for a successful and long-lasting installation. This article provides a comprehensive guide on how to properly lay carpet on a basement cement floor, ensuring a comfortable and durable result.
Testing for Moisture
Prior to any carpet installation, addressing the potential for moisture issues in the concrete is paramount. Concrete is a porous material that can wick moisture from the ground beneath it. Trapped moisture can lead to mold growth, carpet deterioration, and an unhealthy indoor environment. Therefore, thorough moisture testing is indispensable.
Several methods can be employed to assess the moisture content of the concrete slab. One common and relatively inexpensive method is the plastic sheet test. To perform this test, affix a square of clear plastic sheeting (approximately 18 inches by 18 inches) to the concrete floor using duct tape. Ensure the edges are sealed completely. Leave the plastic in place for 24 to 72 hours. After the designated time, inspect the underside of the plastic. If moisture condensation is present, it indicates that moisture is migrating through the concrete. This suggests that further investigation and mitigation strategies are necessary before proceeding with carpet installation.
More sophisticated methods for measuring moisture content include using a concrete moisture meter. These meters provide a numerical reading of the moisture level in the concrete. Follow the manufacturer's instructions for accurate usage and interpretation of the results. Readings above the acceptable threshold for carpet installation indicate the need for mitigation measures.
If moisture is detected, the source of the moisture must be identified and addressed. Potential sources include inadequate exterior drainage, groundwater seepage, or plumbing leaks. Correcting these issues is crucial to prevent recurring moisture problems after the carpet is installed.
Preparing the Concrete Floor
Once the moisture issue is addressed, preparing the concrete floor is the next critical step. Proper preparation ensures that the carpet adhesive bonds effectively and the finished surface is smooth and even.
Start by thoroughly cleaning the concrete floor. Remove any existing debris, such as dirt, dust, paint flakes, glue residue, or any other contaminants. A shop vacuum is ideal for removing loose debris. For stubborn dirt or grime, use a scrub brush and a concrete cleaner. Follow the cleaner manufacturer's instructions carefully, and rinse the floor thoroughly with clean water. Allow the floor to dry completely before proceeding.
Inspect the concrete floor for cracks, holes, or unevenness. Small cracks can be filled with a concrete patching compound. Apply the compound according to the manufacturer's instructions, and allow it to dry completely. For larger cracks or significant unevenness, consider using a self-leveling concrete compound. These compounds are designed to create a smooth, level surface. Follow the manufacturer’s instructions diligently for proper application and curing.
If the concrete floor is particularly rough or porous, consider applying a concrete primer. A primer helps to seal the concrete, reduce porosity, and improve the bond between the concrete and the carpet adhesive. Choose a primer specifically designed for use with carpet adhesive, and apply it according to the manufacturer's instructions. Allow the primer to dry completely before proceeding.
In some cases, especially in older basements, the concrete floor may have a powdery surface called efflorescence. Efflorescence is a salt deposit that can interfere with the adhesion of the carpet. Remove efflorescence by scrubbing the floor with a wire brush and a solution of water and muriatic acid. Exercise extreme caution when working with muriatic acid, wearing appropriate safety gear, including gloves, eye protection, and respiratory protection. Follow the acid manufacturer's instructions precisely, and rinse the floor thoroughly with clean water after treatment.
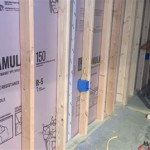
Choosing and Installing a Subfloor
Installing a subfloor over the concrete is highly recommended for basement carpet installations. A subfloor provides several benefits, including improved insulation, moisture protection, and comfort underfoot. There are several subfloor options available, each with its own advantages and disadvantages.
One option is to use interlocking subfloor tiles. These tiles are typically made of plastic or composite materials and snap together to create a floating floor. They provide a moisture barrier and a slightly cushioned surface. Interlocking subfloor tiles are relatively easy to install and can be a good choice for DIY projects. Ensure the chosen tiles are specifically designed for basement use and are resistant to mold and mildew.
Another option is to use wood sleepers and plywood. This method involves installing pressure-treated wood sleepers (typically 2x4s) on the concrete floor, then fastening plywood sheets to the sleepers. The sleepers create an air gap between the concrete and the plywood, which helps to prevent moisture from wicking into the plywood. This method provides a more substantial subfloor that can improve insulation and comfort. However, it is more labor-intensive than installing interlocking tiles.
A third option is to use a rolled subfloor product. These products typically consist of a layer of waterproof membrane bonded to a layer of padding. They are easy to install and provide both moisture protection and cushioning. Rolled subfloor products are a good choice for areas where moisture is a concern and where a quick and easy installation is desired.
Regardless of the subfloor option chosen, ensure that it is installed according to the manufacturer's instructions. Pay close attention to the recommended fastening methods, spacing, and seam sealing. A properly installed subfloor is essential for a long-lasting and comfortable carpet installation.
Selecting Appropriate Carpet and Padding
The choice of carpet and padding is crucial for a successful basement carpet installation. The carpet should be suitable for high-moisture environments and should be resistant to mold and mildew. The padding should also be moisture-resistant and should provide adequate cushioning and support.
For basement carpets, synthetic fibers such as nylon, polypropylene (olefin), or polyester are generally preferred over natural fibers such as wool. Synthetic fibers are less absorbent and more resistant to mold and mildew. Nylon is a durable and resilient fiber that can withstand heavy traffic. Polypropylene is a stain-resistant and budget-friendly option. Polyester is a soft and comfortable fiber that is also resistant to fading.
Avoid using natural fiber carpets like wool in basements, as they are highly susceptible to moisture damage and mold growth. If a natural look is desired, consider synthetic carpets that mimic the appearance of natural fibers.
Choose a carpet with a dense pile and a tight weave. A dense pile will provide better wear resistance and will be less likely to trap moisture. A tight weave will prevent dirt and debris from penetrating the carpet fibers.
The carpet padding should be moisture-resistant and should provide adequate cushioning and support. Closed-cell foam padding is a good choice for basements, as it does not absorb moisture. Consider using a padding with a built-in moisture barrier. The thickness of the padding should be appropriate for the type of carpet being installed. Consult the carpet manufacturer's recommendations for the appropriate padding thickness.
Installing the Carpet
After the subfloor, carpet, and padding are selected, the final step is to install the carpet. Proper installation techniques are essential for a professional-looking and long-lasting result.
Start by unrolling the carpet and allowing it to acclimate to the room temperature for at least 24 hours. This will help to prevent shrinkage or expansion after the carpet is installed. Cut the carpet to fit the room, leaving a few inches of excess around the perimeter. Use a carpet knife and a straight edge for accurate cuts.
Install the carpet padding over the subfloor, using a staple gun or carpet tape to secure it in place. Butt the padding seams together tightly, and tape them to prevent them from shifting. Trim the padding to fit the room, leaving a small gap around the perimeter.
Apply carpet adhesive to the back of the carpet, following the adhesive manufacturer's instructions. Use a notched trowel to spread the adhesive evenly. Work in small sections, and avoid applying too much adhesive. Once the adhesive is applied, carefully position the carpet in the room. Start in one corner and work your way across the room, smoothing the carpet as you go. Use a carpet roller to press the carpet firmly into the adhesive. Ensure that the carpet is stretched tightly and that there are no wrinkles or bubbles.
Trim the excess carpet around the perimeter of the room, using a carpet knife. Leave a slight overhang of carpet, which will be tucked under the baseboards. Install carpet tack strips around the perimeter of the room, positioning them close to the baseboards. The tack strips will hold the carpet in place and prevent it from slipping.
Use a carpet stretcher to stretch the carpet tightly over the tack strips. Hook the carpet onto the tack strips, and use a knee kicker to stretch the carpet further. Tuck the excess carpet under the baseboards, using a tucking tool. Ensure that the carpet is securely attached to the tack strips and that there are no loose edges.
Once the carpet is installed, vacuum it thoroughly to remove any loose fibers or debris. Inspect the carpet for any imperfections, such as wrinkles, bubbles, or loose seams. Address any imperfections promptly to prevent them from becoming larger problems. Allow the adhesive to cure completely before walking on the carpet.
These steps provide a detailed guide to laying carpet on a basement cement floor. By following these instructions carefully and paying attention to detail, a durable and aesthetically pleasing result can be achieved.

How To Carpet A Basement Floor Diy Family Handyman

How To Install Carpet On Concrete

Installing Peel And Stick Carpet Tiles On Concrete Diy Exquisitely Unremarkable

The Best Basement Carpet For Do It Yourself Diy Installations

How To Install Carpet On Concrete In One Day

Carpet In Basements The Issues Solutions And Alternatives Greenbuildingadvisor

Can You Put Floating Carpet Tiles Over Tile Or Concrete Ideas

Can You Put Floating Carpet Tiles Over Tile Or Concrete Ideas

Can You Put Floating Carpet Tiles Over Tile Or Concrete Ideas

How To Paint An Area Rug In The Basement