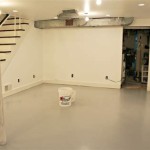
How To Install A Bathroom In A Concrete Basement Floor
Installing a bathroom in a concrete basement floor is a significant home improvement project that can add value and convenience to a property. However, it requires careful planning, adherence to local building codes, and a thorough understanding of plumbing and construction techniques. This article provides a detailed guide to the process, outlining the necessary steps and considerations for a successful installation.
Before embarking on the project, it is crucial to assess the existing conditions of the basement. This includes inspecting the concrete floor for cracks or signs of water damage, checking the headroom to ensure adequate space for fixtures and movement, and verifying the location of existing plumbing lines for potential tie-ins. A thorough assessment will help identify potential challenges and inform the design and planning process.
Securing the correct permits is a mandatory step. Contacting the local building department allows for an understanding of the specific requirements and regulations governing basement bathroom installations in the area. This ensures that the project meets all safety and code compliance standards. Ignoring this step can result in costly rework and legal issues down the line.
Planning and Design Considerations
Effective planning is paramount to the success of a basement bathroom installation. This involves creating a detailed floor plan that optimizes the use of available space and considers the placement of key fixtures, such as the toilet, sink, and shower or bathtub. The layout should also account for adequate clearances around fixtures for comfortable use and accessibility.
The design should integrate with the existing home's aesthetic while reflecting the homeowner’s style preferences. This includes selecting appropriate materials for flooring, walls, and fixtures that are durable, moisture-resistant, and aesthetically pleasing. In basements, it's particularly important to choose materials that can withstand potential humidity and temperature fluctuations.
Ventilation is a critical aspect of bathroom design, especially in basements. A properly functioning exhaust fan is essential to remove moisture and prevent mold growth. The fan should be sized appropriately for the square footage of the bathroom and vented directly to the outside. Consideration should also be given to natural light sources, such as windows or light wells, to improve the ambiance and reduce energy consumption.
Choosing appropriate fixtures is also key. Low-flow toilets and showerheads are recommended for water conservation. Select fixtures that are designed for basements, such as macerating toilets that can handle waste disposal where gravity drainage isn't ideal.
Breaking Concrete and Plumbing Installation
One of the most challenging aspects of installing a basement bathroom is breaking through the concrete floor to install the necessary plumbing. This typically involves using a jackhammer or concrete saw to create trenches for the drain lines and water supply pipes. Safety precautions, such as wearing safety glasses, gloves, and hearing protection, are essential during this process.
The depth and width of the trenches will depend on the size and type of plumbing pipes being installed. It is crucial to ensure that the trenches are properly sloped to allow for gravity drainage. A minimum slope of 1/4 inch per foot is generally recommended for drain lines. This slope ensures that waste flows efficiently and prevents clogs.
Installing the plumbing requires careful attention to detail and adherence to local plumbing codes. This includes using the correct type of pipes and fittings, properly connecting the pipes, and ensuring that all joints are watertight. Professional plumbing assistance may be necessary, especially for complex installations or when dealing with unfamiliar materials.
There are a few options for dealing with drain lines below the existing grade. A sewage ejector pump can be used to pump waste to the main sewer line. Another option is a macerating toilet system, which grinds waste before flushing. Each of these options requires a dedicated electrical circuit and proper venting.
After the plumbing is installed, it is essential to test the system for leaks before covering the trenches with concrete. This can be done by filling the pipes with water and checking for any signs of leakage at the joints and connections. Addressing any leaks promptly is crucial to prevent water damage and future plumbing problems including mold and mildew growth. Consider hiring a plumber to pressure test to ensure that the system is sound before covering it.
Framing, Electrical, and Finishing
Once the plumbing is installed and tested, the next step is to frame the bathroom walls. This involves constructing a wood or metal frame that will support the walls and provide a surface for attaching the drywall or other wall coverings. The framing should be level, plumb, and securely fastened to the concrete floor and ceiling joists.
Electrical work is another critical aspect of the basement bathroom installation. This includes running electrical wiring for the lights, outlets, exhaust fan, and any other electrical fixtures that will be installed. All electrical work should be performed by a licensed electrician to ensure that it meets local electrical codes and safety standards.
Proper grounding of electrical outlets and fixtures is essential to prevent electrical shock. Ground fault circuit interrupters (GFCIs) should be installed in all bathroom outlets to protect against electrical hazards in wet environments. The wiring should be secured and protected from damage during the construction process.
Insulation is crucial for basement bathrooms to maintain a comfortable temperature and prevent condensation. Rigid foam insulation can be applied to the concrete walls to provide thermal insulation and a moisture barrier. Batt insulation can then be installed within the framed walls to further improve insulation.
After insulation, drywall or other wall coverings can be installed. The drywall should be properly taped, mudded, and sanded to create a smooth surface for painting or tiling. Moisture-resistant drywall is recommended for bathrooms to prevent mold growth.
Flooring is another important consideration. Tile is a popular choice for bathrooms due to its durability and water resistance. Other options include vinyl flooring and engineered wood. The flooring should be installed over a level subfloor and properly sealed to prevent water damage.
Ventilation and Fixture Installation
As mentioned earlier, proper ventilation is critical for preventing mold growth and removing moisture. Install an exhaust fan that is properly sized for the space and vented directly to the outside. Ensure the fan is connected to a dedicated switch and operates efficiently.
Installing the toilet, sink, shower, or bathtub requires careful attention to detail and adherence to manufacturer's instructions. Ensure that all fixtures are properly connected to the plumbing and that all joints are watertight. Seal around the base of the toilet and other fixtures with caulk to prevent water from seeping under the flooring.
Lighting is a key element of bathroom design. Install adequate lighting fixtures to provide sufficient illumination for tasks such as shaving and applying makeup. Consider adding recessed lighting, vanity lights, and a ceiling fixture to create a well-lit and inviting space.
Finally, add finishing touches such as mirrors, towel racks, and other accessories to complete the bathroom. Choose accessories that complement the overall design and enhance the functionality of the space. Once all of these steps are complete, the basement bathroom is ready for use.
Dealing with Potential Challenges
Installing a bathroom in a concrete basement floor can present several challenges. Addressing these challenges effectively is crucial for a successful project.
One common challenge is dealing with groundwater seepage. If the basement has a history of water problems, it is essential to address the underlying causes before installing a bathroom. This may involve improving drainage around the foundation, installing a sump pump, or applying a waterproof coating to the walls and floor.
Another challenge is ensuring adequate headroom. If the basement ceiling is low, it may be necessary to lower the floor or raise the ceiling to provide sufficient headroom. Lowering the floor can be a major undertaking that requires excavating and re-pouring the concrete slab. Raising the ceiling may involve structural modifications that require professional engineering assistance.
Permitting can be a major headache. Make sure to research local building codes thoroughly and engage with the local permitting office. Submitting well-documented plans can help expedite the permitting process.
Finally, working in a confined space can present logistical challenges. Coordinating the work of different tradespeople, such as plumbers, electricians, and carpenters, requires careful planning and communication. Keep the work area clean and organized to minimize clutter and prevent accidents.
How To Plumb A Basement Bathroom Diy Family Handyman

How To Install A New Bathroom On Concrete Slab Or In Basement

Basement Bathroom Plumbing Planning For A Below Grade Lavatory

A Basement Bathroom Renovation Merrypad

How To Install A Basement Bathroom Awesome Quick Tips By Home Repair Tutor Youtube

How To Install A New Bathroom On Concrete Slab Or In Basement

Adding A Basement Bathroom Clearwater Plumbers

How To Diy Bathroom In Basement Without Breaking Concrete

How To Diy Bathroom In Basement Without Breaking Concrete

Adding A Bathroom On Concrete Slab Foundation Renos 4 Pros Joes
Related Posts


