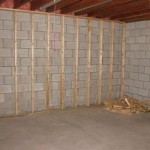
How to Drain a Shower in a Basement
Basements are prone to moisture issues, particularly in areas with high humidity or frequent rainfall. A leaking shower can exacerbate these problems, leading to mold growth, structural damage, and unpleasant odors. Fortunately, draining a basement shower is a relatively straightforward process that can be tackled by homeowners with basic plumbing knowledge.
Before attempting to drain a basement shower, it is important to identify the source of the leak. This can be done by examining the shower stall for signs of water damage, such as cracked grout, loose tiles, or warped wood. The leak may originate from the showerhead, the drain, the plumbing pipes, or the shower pan itself. Once the source of the leak has been identified, the appropriate steps can be taken to drain the shower.
Step-by-Step Instructions for Draining a Basement Shower
The following steps provide a general guide for draining a basement shower. Specific steps may vary depending on the type of shower and the source of the leak. It is always recommended to consult a professional plumber for complex or persistent leaks.
1. Turn Off the Water Supply
The first step is to turn off the water supply to the shower. This is usually done by turning the shut-off valve located near the shower. If the valve is not easily accessible, it may be necessary to shut off the main water supply to the house. The valve is typically located on the water main line, often near the water meter.
2. Drain the Shower Pan
Once the water supply is turned off, the next step is to drain the shower pan. If the shower pan is equipped with a drain plug, it can be removed to drain the water. If there is no drain plug, it may be possible to use a siphon to drain the water. A siphon is a flexible tube that is used to transfer liquid from one container to another by creating a vacuum. Alternatively, a pump can be used to drain the remaining water from the shower pan.
3. Disassemble the Showerhead
If the leak is coming from the showerhead, it will need to be disassembled and inspected. Start by removing the showerhead from the pipe using an adjustable wrench. Once the showerhead is removed, it can be inspected for any signs of damage or wear. If the showerhead is damaged, it will need to be replaced. If the showerhead is in good condition, it may be possible to clean it with vinegar to remove mineral deposits.
4. Inspect the Drain
If the leak is coming from the drain, it will need to be inspected and potentially cleaned. The drain can be accessed by removing the drain cover. Once the drain cover is removed, it can be inspected for any signs of blockage or damage. If the drain is blocked, it will need to be cleaned. If the drain is damaged, it will need to be replaced.
5. Check the Plumbing Pipes
If the leak is coming from the plumbing pipes, it will need to be repaired. The plumbing pipes can be inspected by tracing them from the showerhead to the shut-off valve. The pipes can be examined for any signs of corrosion, leaks, or damage. Leaky pipes can be repaired with pipe clamps or sealing tape, but in some cases, the pipe may need to be replaced.
Tips for Preventing Future Leaks
Preventing future leaks in a basement shower requires regular maintenance and proactive measures. Here are some tips to consider:
1. Inspect and Clean Regularly
Regularly inspect the shower stall for signs of water damage, such as cracked grout, loose tiles, or warped wood. Clean the grout lines with a mildew-resistant cleaner to prevent mold growth. Remove any mineral deposits from the showerhead to ensure proper water flow.
2. Check for Leaks Early
Monitor the shower for signs of leaks, such as drips after use, water stains, or dampness around the base of the shower. Address any leaks promptly to prevent damage and costly repairs.
3. Maintain Plumbing Pipes
Check the plumbing pipes for signs of corrosion or leaks, and repair or replace them as needed. Insulate the pipes to prevent freezing and burst pipes during the winter months.
4. Consider a Waterproof Membrane
Install a waterproof membrane beneath the shower pan to prevent water damage if a leak occurs. This can help protect the basement from structural damage.
Conclusion
Draining a basement shower is a crucial step in maintaining a dry and healthy basement environment. By following these instructions, homeowners can address leaks promptly and effectively. However, if the leak is extensive or complex, it is always recommended to seek professional assistance from a licensed plumber.

How To Plumb A Basement Bathroom Diy Family Handyman

How To Plumb A Basement Bathroom Diy Family Handyman

How To Install A Fiberglass Base Over Concrete Diy Family Handyman

Bathroom Drain Relocation In A Basement Finish Draper Ut

How To Plumb A Basement Bathroom Diy Family Handyman

Basement Shower Drain Connects To Floor Redflagdeals Com Forums

Basement Bathroom Rough In Plumbing Tour

Shower Drain On Concrete Slab

Finishing A Rough In Basement Bathroom Drains Doityourself Com Community Forums
Installation Of Shower Drain In The Basement Mister Plumber
Related Posts
