How to Concrete a Basement Floor
Concreting a basement floor is a significant undertaking that enhances functionality, durability, and overall value. This comprehensive guide outlines the necessary steps to successfully concrete a basement floor, from initial preparation to the finishing touches. Proper execution of these procedures ensures a long-lasting, high-quality concrete surface.
Planning and Preparation
Thorough planning and preparation lay the groundwork for a successful concrete pour. Key aspects include:
- Assess the existing surface: Examine the existing basement floor for cracks, unevenness, and moisture issues. Address any underlying problems before proceeding.
- Measure and calculate materials: Accurate measurements of the basement area determine the required amount of concrete, gravel, and other materials. Consult online calculators or concrete suppliers for assistance.
- Gather necessary tools and equipment: Assemble all necessary tools, including a concrete mixer, wheelbarrow, screed board, floats, trowels, and safety gear.
- Check local building codes: Verify compliance with local building codes concerning concrete thickness, reinforcement requirements, and vapor barriers.
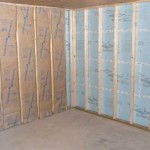
Installing a Vapor Barrier
A vapor barrier is crucial for preventing moisture migration through the concrete slab. Follow these steps for proper installation:
- Prepare the subgrade: Ensure the subgrade is level and compacted. A layer of compacted gravel can improve drainage and provide a stable base.
- Lay the vapor barrier: Overlap the sheets of vapor barrier by at least 6 inches and seal the seams with tape. Extend the barrier up the walls several inches.
- Tape the seams: Securely tape all seams and overlaps to create a continuous, impermeable barrier.
Adding Gravel Base and Reinforcement
A gravel base enhances drainage and provides a level surface for the concrete. Reinforcement adds structural integrity and helps prevent cracking.
- Spread the gravel: Distribute a layer of gravel, typically 4 inches thick, evenly over the vapor barrier.
- Compact the gravel: Use a hand tamper or plate compactor to compact the gravel, creating a stable and level base.
- Install reinforcement: Place wire mesh or rebar over the gravel base, ensuring it is elevated slightly to be embedded within the concrete slab.
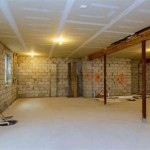
Pouring and Finishing the Concrete
Pouring and finishing the concrete requires careful attention to detail. Consistent procedures ensure a smooth and durable surface.
- Mix the concrete: Mix the concrete according to the manufacturer’s instructions, achieving a consistent and workable consistency.
- Pour the concrete: Pour the concrete evenly over the gravel base and reinforcement, starting at one corner and working across the area.
- Screed the surface: Use a screed board to level the concrete surface, removing excess concrete and filling any low spots.
- Float the concrete: Use a bull float or hand float to smooth the surface and embed any aggregate, creating a more refined finish.
- Trowel the surface (optional): For a smoother finish, trowel the concrete after it has begun to set. This creates a dense, hard surface.
- Control joints: Create control joints using a groover or saw to prevent cracking due to shrinkage and temperature changes.
- Cure the concrete: Keep the concrete moist for several days after pouring to allow it to cure properly. This process strengthens the concrete and prevents premature drying and cracking.
Important Considerations
Several important considerations should be kept in mind throughout the process:
- Proper Ventilation: Ensure adequate ventilation during the pouring and curing process, especially in enclosed basement areas.
- Temperature Control: Concrete performs best when poured at moderate temperatures. Avoid pouring in extreme heat or cold.
- Safety Precautions: Wear appropriate safety gear, including eye protection, gloves, and dust masks, throughout the project.
Post-Pouring Care
Proper post-pouring care is essential for ensuring the concrete’s longevity and performance.
- Curing: Maintaining adequate moisture levels during the curing process is crucial for concrete strength development. Regularly misting the surface or covering it with plastic sheeting helps retain moisture.
- Sealing (optional): Applying a concrete sealer after the curing period can enhance resistance to stains, moisture, and wear. Choose a sealer appropriate for basement floor applications.

How To Stain Concrete Basement Floor Diy Guide

A Guide To Stained Concrete Basement Floors

15 Diy Basement Flooring Ideas Affordable Options For Basements

Polished Concrete Flooring Options For Your Basement Duraamen

Diy Basement Floor Stain And Finish 2 Colors Without Etching Youtube

Marblelife Basement

The Ultimate Guide To Staining A Basement Floor Semigloss Design

Post Flood Cleanup How To Clean A Concrete Basement Floor Csg Renovation

Bolster Your Basement Concrete Floor Coating Essentials Viking Floors

Basement Floor Coating Galaxy Concrete Coatings
Related Posts