How to Build a Retaining Wall for a Walkout Basement
Constructing a retaining wall for a walkout basement involves careful planning, precise execution, and adherence to local building codes. This type of project is often undertaken to provide structural support, manage soil erosion, and create a functional outdoor space accessible from the basement level. This article details the essential steps involved in building a durable and effective retaining wall for a walkout basement, covering design considerations, necessary materials, and construction techniques.
Planning and Design Considerations
Before commencing any physical work, a comprehensive plan is crucial. This phase dictates the success and longevity of the retaining wall. Factors such as soil type, water drainage, wall height, and local building regulations must be thoroughly assessed.
Soil Analysis: The type of soil present significantly impacts the design of the retaining wall. Different soil types possess varying load-bearing capacities and drainage characteristics. Sandy soils generally drain well but offer less support compared to clay soils, which retain water and can exert significant pressure on the wall. A geotechnical engineer should be consulted to analyze the soil and provide recommendations for wall design and drainage solutions. This analysis will determine the required wall thickness, reinforcement needs, and the type of backfill material best suited for the site.
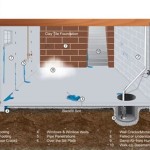
Drainage: Proper drainage is paramount to prevent hydrostatic pressure buildup behind the wall. Water accumulation can lead to wall failure over time. A drainage system typically consists of a perforated drain pipe placed at the base of the wall, surrounded by gravel. This pipe collects water and directs it away from the wall. Additionally, weep holes should be incorporated into the wall structure to allow water to escape. Geotextile fabric should be used to separate the gravel from the backfill soil, preventing soil particles from clogging the drainage system.
Wall Height and Slope: The height of the retaining wall directly influences its structural requirements. Taller walls necessitate thicker construction and more robust reinforcement. The slope of the retained soil also affects the pressure exerted on the wall. Steeper slopes increase the lateral pressure. Engineering calculations, often required by building codes, are essential to determine the appropriate wall dimensions and reinforcement specifications based on these factors.
Building Codes and Permits: Prior to construction, it is imperative to obtain the necessary building permits from the local municipality. Building codes dictate the design and construction standards for retaining walls, ensuring structural integrity and safety. These codes may specify requirements for wall height, setback distances, drainage systems, and reinforcement. Failure to comply with building codes can result in fines, delays, and even demolition of the improperly constructed wall.
Material Selection: The choice of building material significantly impacts the cost, aesthetics, and longevity of the retaining wall. Common materials include concrete blocks, poured concrete, natural stone, and treated lumber. Concrete blocks and poured concrete offer durability and strength, while natural stone provides a more aesthetically pleasing appearance. Treated lumber is a less expensive option but may require more frequent maintenance and replacement over time. The selection process should consider the overall design, budget, and soil conditions.
Construction Process
The construction of a retaining wall for a walkout basement follows a systematic process, beginning with site preparation and culminating in backfilling and finishing.
Excavation: The first step involves excavating the area behind the planned wall location. The excavation should extend deep enough to accommodate the foundation of the wall, as well as the drainage system. The width of the excavation should allow sufficient workspace for construction activities. It's crucial to accurately mark the wall's location before excavation begins, ensuring alignment with the design plans.
Foundation Preparation: A solid foundation is critical for the stability of the retaining wall. The foundation typically consists of a compacted gravel base. The gravel base should be level and compacted to provide a uniform bearing surface. The depth of the gravel base depends on the soil conditions and the height of the wall, but generally ranges from 6 to 12 inches. A layer of geotextile fabric can be placed between the subsoil and the gravel base to improve drainage and prevent soil contamination.
Building the Wall: The method for building the wall depends on the chosen material. For concrete block walls, the blocks are laid in courses, similar to building a brick wall. Each course should be level and aligned. Mortar is used to bind the blocks together, ensuring a strong and watertight connection. For poured concrete walls, forms are constructed to contain the concrete. Reinforcing steel bars (rebar) are placed within the forms to provide added strength. Concrete is then poured into the forms and allowed to cure. For natural stone walls, the stones are carefully selected and arranged to create a stable and visually appealing structure. Mortar can be used to bind the stones together, or the wall can be constructed as a dry-stacked wall, relying on the weight and interlocking of the stones for stability.
Drainage Installation: As the wall is being built, the drainage system should be installed. A perforated drain pipe is placed at the base of the wall, behind the first course of blocks or at the footing level for poured concrete. The pipe should be sloped to allow water to drain away from the wall. The pipe is then covered with gravel, typically extending 12 to 18 inches up the back of the wall. Geotextile fabric is placed between the gravel and the backfill soil to prevent soil particles from clogging the drainage system. Weep holes, typically 2 to 4 inches in diameter, should be installed at regular intervals along the wall's face to allow any water that accumulates behind the wall to escape. These should be placed at the lowest possible point.
Backfilling: Once the wall has reached its desired height and the drainage system is in place, the backfilling process can begin. Backfill material should be placed in layers, typically 6 to 12 inches thick, and compacted thoroughly. Compaction is essential to prevent settling and to provide lateral support for the wall. Granular backfill materials, such as gravel or crushed stone, are preferred because they provide good drainage. Clay soils should be avoided as backfill because they retain water and can exert excessive pressure on the wall. As the backfill is added, the wall should be checked for plumb and alignment. Any necessary adjustments should be made before the backfill reaches the top of the wall.
Finishing: The final step involves finishing the top of the wall and the surrounding area. The top of the wall can be capped with concrete blocks, natural stone, or other materials to provide a finished look. The area behind the wall can be graded to ensure proper drainage away from the wall. Landscaping can be added to enhance the aesthetics of the area. This might include planting shrubs, installing a patio, or adding steps leading down to the walkout basement.
Ensuring Long-Term Stability and Maintenance
The long-term stability of a retaining wall depends on proper construction techniques, adequate drainage, and regular maintenance. Periodic inspections should be conducted to identify any signs of distress, such as cracks, bulging, or tilting. Addressing these issues promptly can prevent more serious problems from developing.
Regular Inspections: It is crucial to inspect the retaining wall at least twice a year, ideally in the spring and fall. This allows for the identification of any potential issues that may have arisen due to seasonal changes or weather events. Look for cracks in the wall's surface, particularly along mortar joints or in poured concrete sections. Check for any bulging or tilting of the wall, which could indicate excessive pressure from the backfill. Also, inspect the weep holes to ensure they are clear of debris and functioning properly. Pooling water behind the wall or excessive moisture seeping through the wall's surface are signs of inadequate drainage.
Drainage Maintenance: Maintaining the drainage system is essential to prevent hydrostatic pressure buildup. Regularly inspect the weep holes and clear any debris, such as leaves or soil, that may be blocking them. The drain pipe at the base of the wall should also be inspected periodically. If the drainage system is not functioning properly, it may be necessary to excavate behind the wall and replace the drain pipe or the gravel backfill. It might be considered to install cleanouts for the drainage pipes enabling to flush them with high pressure water if needed.
Addressing Cracks and Damage: Small cracks in the mortar joints of a concrete block or natural stone wall can be repaired with mortar. Larger cracks or damaged sections of the wall may require more extensive repairs, such as replacing damaged blocks or stones. In severe cases, it may be necessary to rebuild a portion of the wall. Cracks in a poured concrete wall should be repaired with epoxy or other suitable crack repair materials. Consulting with a structural engineer is recommended for significant damage or concerns about the wall's stability.
Vegetation Control: Plant roots can exert pressure on the retaining wall and contribute to its deterioration. Trees and shrubs should be planted at a safe distance from the wall to prevent root intrusion. Regularly remove any vegetation that is growing on or near the wall. Herbicides can be used to control weed growth, but care should be taken to avoid damaging the surrounding soil or plants.
Building a retaining wall for a walkout basement is a complex project that requires careful planning, precise execution, and attention to detail. By following these guidelines and consulting with professionals when needed, it is possible to build a durable and effective retaining wall that enhances the functionality and aesthetics of the property.

Retainer Wall Build And Planting A Dry Creek Bed Creative Cain Cabin

Retaining Walls Walkouts Three Little Pigs Masonry

Retaining Walls Walkouts Three Little Pigs Masonry

Walkout Basement Retaining Wall Walls 42 Created A Walk Backyard Patio Concrete Makeover

Retainer Wall Build And Planting A Dry Creek Bed Creative Cain Cabin

Retaining Walls And Walk Out Basement Details Custom Homes By Tompkins Construction

Walkout Basement With Retaining Walls Q A Hometalk Forum

Retaining Walls And Walk Out Basement Details Custom Homes By Tompkins Construction
Walkout Basement With Retaining Walls Q A Hometalk Forum

Retainer Wall Build And Planting A Dry Creek Bed Creative Cain Cabin
Related Posts


