Building a Temporary Wall in a Basement
A basement can be a valuable space for storage, a workshop, or even a living area. However, basements can also present challenges when it comes to organization and privacy. A temporary wall can be an effective solution for creating defined spaces, improving organization, or simply adding a degree of privacy to your basement.
Building a temporary wall is a relatively simple project that can be completed in a weekend with basic tools and materials. This article will guide you through the essential steps involved in constructing a temporary wall in your basement, providing you with the information you need to complete this project successfully.
Choosing the Right Materials
The first step is to choose the right materials for your temporary wall. The most common options include:
Drywall:
Drywall is a relatively inexpensive and easy-to-install option that offers a clean, finished look. It can be painted or wallpapered to match your basement's decor.
Plywood:
Plywood is another popular choice for temporary walls. It is strong and durable, making it suitable for areas where the wall might experience some wear and tear. However, plywood typically requires more finishing work to achieve a polished look.
Fabric:
Fabric panels can provide a more decorative and less permanent solution for creating a temporary wall. You can choose from a variety of fabrics to achieve the desired aesthetic. Fabric panels are usually mounted on a frame or track system, allowing for easy removal and repositioning.Planning and Preparation
Once you've chosen your materials, it's time to plan the layout of your temporary wall.
Measure and mark:
Measure the area where you want to build the wall and mark the location on the floor and ceiling. Ensure that the wall is properly aligned with any existing structures or fixtures, such as doorways, staircases, or plumbing.
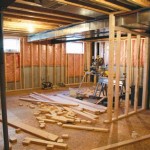
Framing:
If you are using drywall or plywood, you will need to construct a framing system. This involves creating a framework of studs to support the sheathing. Use 2x4 lumber for the studs, and make sure to use a stud finder to locate existing wall studs in the basement to ensure proper support.
Prepare the walls:
Clean the walls where the temporary wall will be attached. Remove any dust, dirt, or debris that could interfere with the installation.Installing the Temporary Wall
With the preparation completed, you can now install the temporary wall.
Attaching the wall:
For drywall or plywood, attach the sheathing to the framing using screws or nails. Make sure to drive the fasteners through the sheathing and into the studs for a secure connection. If using fabric panels, mount them to a frame or track system according to the manufacturer's instructions.
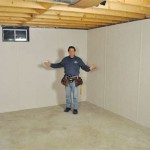
Finishing:
Once the wall is in place, you can finish it to your liking. Drywall can be taped, mudded, and painted to match your basement's decor. Plywood may require some sanding and painting.
Adding doors:
If you need to access the area behind the temporary wall, you can install a door. Choose a suitable door size and style that complements the existing design of your basement.Important Considerations
Here are some things to keep in mind when building a temporary wall in a basement:
Code compliance:
Check with your local building codes to ensure that your temporary wall meets the requirements for safety, fire resistance, and insulation.
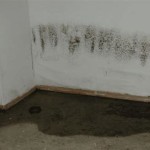
Moisture control:
Basements can be prone to moisture problems. If you are building a temporary wall in a basement, consider using moisture-resistant materials, such as treated lumber or moisture-resistant drywall.
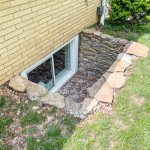
Ventilation:
Ensure adequate ventilation in the area behind the temporary wall to prevent moisture buildup and mildew growth.
Electrical wiring:
If you plan to install electrical outlets in the temporary wall, consult with a qualified electrician to ensure proper wiring and safety.
How To Build A Temporary Brace Wall Fine Homebuilding

How To Build A Temporary Wall Divide Room For Private Office Or Bedroom Twin Civet

Beam Project Temporary Wall Two Flat Remade

How To Build A Temporary Wall Divide Room For Private Office Or Bedroom Twin Civet

How To Build A Temporary Wall

How To Build A Temporary Wall

Building A Temporary Room In 5 Minutes Time Lapse

How To Build A Temporary Wall Divide Room For Private Office Or Bedroom Twin Civet

How To Build A Fake Wall 12 Steps With S Wikihow

Structural Feedback On My Temporary Support Wall Home Improvement Stack Exchange
Related Posts