How to Plumb a Toilet in a Basement
Installing a toilet in a basement can be a daunting task, but with the right tools and materials, it can be completed in a few hours. Here are the essential steps to help you plumb a toilet in a basement successfully:
Tools and Materials you'll need:
Tools:
- Adjustable wrench
- Basin wrench
- Channel locks
- Level
- Plunger
- Tape measure
Materials:
- Toilet
- Toilet flange
- Toilet wax seal
- Toilet bolts
- Water supply line
- P-trap
- Vent pipe
- PVC cement
- Drywall saw
Step 1: Prepare the Basement Space
Begin by clearing the area where the toilet will be installed. Cut a hole in the drywall to expose the drain pipe and water supply lines. Measure and mark the location of the toilet flange on the floor. Ensure there is enough clearance for the toilet to fit comfortably.
Step 2: Install the Toilet Flange
Place the toilet flange over the drain pipe and secure it with screws. Apply a bead of PVC cement to the bottom of the flange for added stability. Allow the cement to dry completely before proceeding.
Step 3: Set the Toilet
Place the toilet wax seal on the toilet flange. Carefully lift the toilet and set it in place over the seal. Press down firmly to ensure a good seal. Use the level to check if the toilet is level. Adjust the toilet bolts as needed to level it.
Step 4: Install the Water Supply Line
Connect the water supply line to the toilet fill valve. Ensure the connection is tight and secure by using an adjustable wrench. Turn on the water supply and check for any leaks.
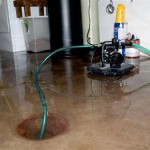
Step 5: Install the P-trap and Vent Pipe
Attach the P-trap to the toilet drain outlet. Apply a bead of PVC cement to the joints and connect the vent pipe to the top of the P-trap. Run the vent pipe through the wall and connect it to the main vent stack.
Step 6: Secure the Toilet
Tighten the toilet bolts further to secure the toilet. Do not overtighten the bolts as this can crack the toilet bowl or base.
Step 7: Test and Seal
Flush the toilet to test for any leaks. If there are leaks, tighten the connections or replace the wax seal. Plunge the toilet to check if the P-trap is functioning correctly. Finally, apply a bead of silicone caulk around the base of the toilet to seal any gaps.
Additional Tips:
- Use a flange extender if the existing flange is not level with the floor.
- Cut the vent pipe to the appropriate length to avoid any interference with the drywall.
- Use a water pressure regulator if the water pressure is too high.
- If you encounter any difficulties, do not hesitate to consult a licensed plumber for assistance.
Following these steps will help you successfully plumb a toilet in your basement. With proper planning and attention to detail, the process can be completed efficiently and effectively.

How To Plumb A Basement Bathroom Diy Family Handyman

Basement Toilet Installation Dr Pipe Drain And Plumbing Toronto

Basement Bathroom Plumbing Planning For A Below Grade Lavatory

Basement Bathroom Plumbing Planning For A Below Grade Lavatory

Basement Toilet Pump Plumbing Inspections Internachi Forum

Plumbing Diagram Basement Rev Bathroom Shower

A Basement Bathroom Renovation Merrypad

How Do I Vent The Plumbing For My Basement Bathroom Home Improvement Stack Exchange

How To Finish A Basement Bathroom Pex Plumbing

Basement Bathroom Plumbing Layout Page 3 Diy Home Improvement Forum
Related Posts